

Stucco is a popular siding material that’s durable and weatherproof. But it also absorbs water and can cause moisture problems.
When stucco becomes damaged, it’s time to remove it. Ho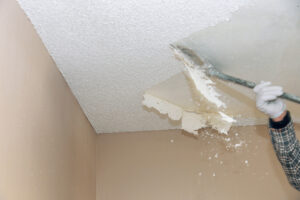 wever, it’s important to do it correctly. This will prevent further damage to your home and help you avoid the cost of repairs down the road. If you need some professional expertise to do the job for you, contact Stucco Repair Philadelphia.
If your home has stucco siding, it is important to periodically clean the surface of the exterior walls. This will help keep it looking good and free of dirt, grime, mold, and algae. Stucco is a textured material that allows air to circulate through the surface. However, this textured surface also traps pollutants and dust, which can age the look of your house and damage its integrity.
In the presence of moisture and sunlight, moss and algae will grow on your outer wall surfaces. These organisms are able to penetrate the pores of your stucco and grow to a noticeable size. If left untreated, these stains will not only detract from the overall appearance of your property, but they can even pose a health risk for you and your family.
Green algae are photosynthetic organisms whose cells contain chlorophyll a and b, which impart them a green color. They are the closest relatives of higher plants and live in fresh or salt water.
They can be found in ponds, lakes, streams, and seas. During certain times of the year, lakes can appear green because of a large bloom of algae. This is commonly referred to as a “whiting event.”
Although they are very common in nature, they can be dangerous for humans and animals when they become invasive. These organisms can eat the nutrients found in the water, and they can cause serious problems with fish, aquatic life, and human health.
The most effective way to remove green algae is by using a cleaning solution with bleach. This is a powerful cleaner that can break down the fungi and other pollutants that have grown on your stucco surface. The chemical compound in the bleach will kill them and leave your surface clean and free of stains.
When you are done scrubbing the stucco surface, you can then rinse it with water to remove any remaining pollutants. The water will help wash away the bleach solution and any other traces of algae or mildew that may remain on the stucco surface.
If you are dealing with stubborn stains, it may be best to use a soft-bristle brush instead of a sponge to scrub the stains off. Scrub the stain in small sections while maintaining a firm pressure with your brush. You will then rinse the area with water and the stains should be completely removed.
Cleaning your stucco is not only important to maintain its beauty and protect the interior of your house, but it can also make your house safer by preventing mold and mildew from developing in the wall structure. Before you begin cleaning, be sure to inspect your walls for cracks or chips that could give water access to the wall structure behind the stucco. These issues could lead to mold and mildew forming inside your home, which would need professional repairs.
Once you’ve found any cracks or chips in your stucco, repair them before beginning your cleaning process. This is especially important if you plan to use a pressure washer to clean your stucco.
The next step is to apply a cleaning solution made with dish soap and water to the stucco. This will help to remove any stains, dirt, and grime. The best way to do this is to spray the cleaner on the surface of your stucco and allow it to sit for 5 to 10 minutes.

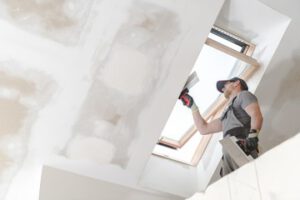 First, you need to make sure that your drywall is bone-dry before applying any primer or paint. In addition, you may need to sand the surface of your drywall. This is to make the paint adhere better.